Introduction
Painting plastic chairs is a great way to give them a new look and add a splash of color to your home. Whether you’re looking to spruce up a set of outdoor chairs or give a tired-looking chair a new lease of life, painting plastic chairs is a relatively simple and inexpensive way to do it. In this guide, we’ll show you how to prepare and paint plastic chairs, so you can get the best results.
Preparing Plastic Chairs for Painting: What You Need to Know
Painting plastic chairs can be a great way to give them a new look and add a personal touch to your home. However, before you start painting, there are a few steps you need to take to ensure the best results.
First, you need to make sure the chairs are clean and free of dirt and debris. Use a damp cloth to wipe down the chairs and remove any dust or dirt. If the chairs are particularly dirty, you may need to use a mild detergent and warm water to get them clean.
Once the chairs are clean, you need to prepare them for painting. Start by sanding the chairs with a medium-grit sandpaper. This will help the paint adhere better and create a smoother finish. Once the chairs are sanded, use a damp cloth to remove any dust or debris.
Next, you need to apply a primer to the chairs. Primer helps the paint adhere better and prevents it from chipping or peeling. Make sure to apply the primer evenly and allow it to dry completely before moving on to the next step.
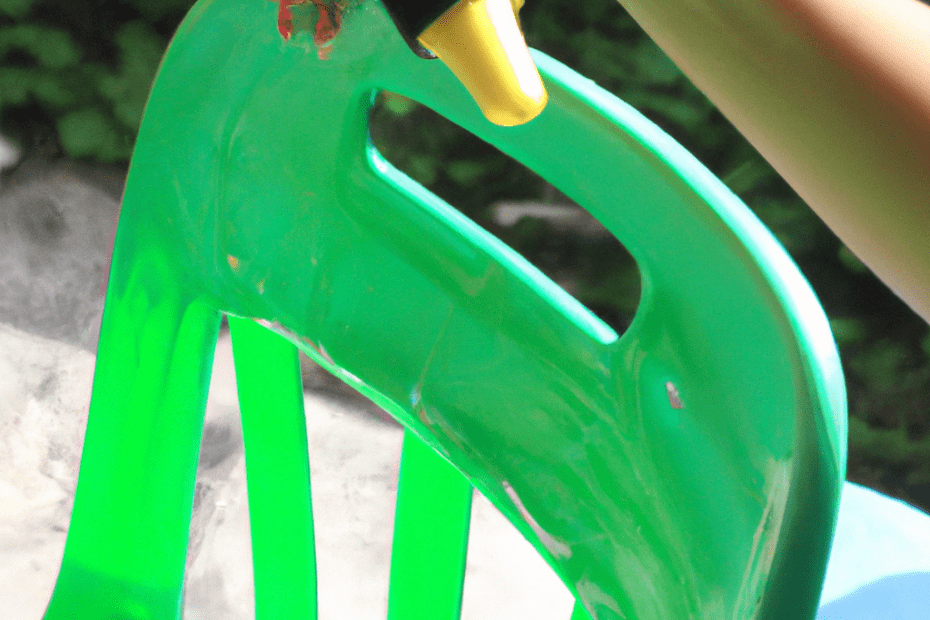
Finally, you can begin painting the chairs. Use a brush or roller to apply the paint in even strokes. Allow the paint to dry completely before applying a second coat. Once the chairs are completely dry, you can add a sealant to protect the paint and give it a glossy finish.
By following these steps, you can ensure that your plastic chairs look great and last for years to come.
Choosing the Right Paint for Plastic Chairs
When it comes to painting plastic chairs, it is important to choose the right type of paint to ensure that the job is done correctly and that the paint will last. There are several types of paint that can be used on plastic chairs, and each has its own advantages and disadvantages.

The most common type of paint used on plastic chairs is acrylic paint. Acrylic paint is easy to apply and dries quickly, making it a great choice for those who want to get the job done quickly. It is also very durable and can withstand a lot of wear and tear. However, acrylic paint is not as resistant to fading and chipping as other types of paint, so it may need to be reapplied more often.
Another type of paint that can be used on plastic chairs is enamel paint. Enamel paint is more durable than acrylic paint and is resistant to fading and chipping. It is also more expensive than acrylic paint, but it is worth the extra cost if you want a long-lasting finish.
Finally, there is spray paint. Spray paint is the easiest type of paint to apply and is the most cost-effective option. However, it is not as durable as other types of paint and may need to be reapplied more often.
No matter which type of paint you choose, it is important to make sure that you prepare the plastic chairs properly before painting. This includes cleaning the chairs with a mild detergent and water, sanding them down, and priming them with a plastic primer. Once the chairs are prepared, you can then apply the paint of your choice.
By taking the time to choose the right type of paint for your plastic chairs, you can ensure that the job is done correctly and that the paint will last for years to come.
How to Apply Primer to Plastic Chairs for a Professional Finish
If you are looking to give your plastic chairs a professional finish, applying primer is an important step. Primer helps to create a smooth surface for the paint to adhere to, and it also helps to protect the plastic from the elements. Here is a step-by-step guide to applying primer to plastic chairs for a professional finish.
1. Prepare the chairs. Before you begin, make sure the chairs are clean and free of any dirt or debris. Use a damp cloth to wipe down the chairs and remove any dust or dirt.
2. Apply the primer. Using a brush or roller, apply a thin layer of primer to the chairs. Make sure to cover all surfaces, including the legs and arms. Allow the primer to dry completely before moving on to the next step.

3. Sand the chairs. Once the primer is dry, use a fine-grit sandpaper to lightly sand the chairs. This will help to create a smooth surface for the paint to adhere to.
4. Apply a second coat of primer. Once the chairs have been sanded, apply a second coat of primer. Make sure to cover all surfaces, including the legs and arms. Allow the primer to dry completely before moving on to the next step.
5. Paint the chairs. Once the primer is dry, you can begin painting the chairs. Use a brush or roller to apply the paint in even strokes. Allow the paint to dry completely before using the chairs.
Following these steps will help you to achieve a professional finish when painting plastic chairs. Make sure to take your time and apply the primer and paint in thin, even coats for the best results.
Tips for Painting Plastic Chairs with a Brush

1. Prepare the Plastic Chair: Before you begin painting, make sure to clean the plastic chair with a damp cloth to remove any dirt or debris. If the chair is particularly dirty, you may need to use a mild detergent. Allow the chair to dry completely before you begin painting.
2. Sand the Chair: Use a medium-grit sandpaper to lightly sand the surface of the plastic chair. This will help the paint adhere better and create a smoother finish.
3. Apply Primer: Apply a coat of primer to the chair. This will help the paint adhere better and create a more even finish. Allow the primer to dry completely before you begin painting.
4. Paint the Chair: Use a brush to apply the paint to the chair. Start with the legs and work your way up. Use long, even strokes and make sure to cover all areas of the chair. Allow the paint to dry completely before applying a second coat.
5. Apply a Clear Coat: Once the paint has dried, apply a clear coat to the chair. This will help protect the paint and create a glossy finish. Allow the clear coat to dry completely before using the chair.
Spray Painting Plastic Chairs: What You Need to Know
Spray painting plastic chairs is a great way to give them a new look and add a touch of color to your home. However, it is important to understand the process and the materials needed to ensure a successful outcome.
Before you begin, make sure the chairs are clean and free of dirt and debris. This will help the paint adhere better and create a smoother finish. You will also need to use a primer specifically designed for plastic surfaces. This will help the paint adhere better and create a more durable finish.
When it comes to the actual painting, you will need to use a spray paint specifically designed for plastic surfaces. This type of paint is designed to adhere to plastic surfaces and provide a more durable finish. Make sure to apply the paint in thin, even coats and allow each coat to dry before applying the next.
Finally, you will need to apply a clear coat of sealer to protect the paint and ensure a longer-lasting finish. Make sure to apply the sealer in thin, even coats and allow each coat to dry before applying the next.
By following these steps, you can successfully spray paint plastic chairs and give them a new look. With the right materials and a bit of patience, you can create a beautiful and durable finish that will last for years to come.
How to Achieve a Smooth Finish When Painting Plastic Chairs
Painting plastic chairs can be a great way to give them a new look and add a personal touch to your home. However, achieving a smooth finish can be tricky. Here are some tips to help you get the best results when painting plastic chairs.
1. Start by cleaning the chairs thoroughly. Use a mild detergent and warm water to remove any dirt or debris. Allow the chairs to dry completely before you begin painting.
2. Use a high-quality primer designed for plastic surfaces. This will help the paint adhere better and create a smoother finish.
3. Use a brush or roller to apply the primer in thin, even coats. Allow each coat to dry completely before applying the next.
4. Once the primer is dry, you can begin painting. Use a brush or roller to apply the paint in thin, even coats. Allow each coat to dry completely before applying the next.
5. Once the paint is dry, you can apply a clear coat of sealer. This will help protect the paint and create a smoother finish.
By following these steps, you can achieve a smooth finish when painting plastic chairs. With a little patience and the right supplies, you can give your chairs a fresh new look.
Painting Plastic Chairs with Acrylic Paint: What You Need to Know
Painting plastic chairs with acrylic paint is a great way to give them a new look and add a personal touch to your home. However, it is important to understand the basics of painting plastic chairs with acrylic paint before you begin.
First, you will need to prepare the surface of the chair. This includes cleaning the chair with a mild detergent and water, and then sanding it with a medium-grit sandpaper. This will help the paint adhere better to the plastic. Once the chair is clean and sanded, you should apply a primer to the chair. This will help the paint adhere better and provide a better base for the paint.
Next, you will need to choose the right type of acrylic paint for your project. Acrylic paint is available in a variety of colors and finishes, so you can choose the one that best suits your needs. When painting plastic chairs, it is important to use a paint that is specifically designed for plastic surfaces. This will ensure that the paint adheres properly and does not chip or peel off.
Finally, you will need to apply the paint to the chair. You can use a brush or a roller to apply the paint. Make sure to use even strokes and to cover the entire surface of the chair. Once the paint is dry, you can apply a sealer to protect the paint and make it last longer.
Painting plastic chairs with acrylic paint is a great way to give them a new look and add a personal touch to your home. However, it is important to understand the basics of painting plastic chairs with acrylic paint before you begin. With the right preparation and the right type of paint, you can easily transform your plastic chairs into something new and unique.
How to Create a Custom Design on Plastic Chairs
Creating a custom design on plastic chairs is a great way to add a unique touch to any room. With a few simple steps, you can transform a plain plastic chair into a one-of-a-kind piece of furniture.
Before you begin, make sure the chair is clean and free of dust and dirt. If necessary, use a damp cloth to wipe down the surface. Once the chair is clean, you can begin the design process.
First, decide on the design you want to create. You can use stencils, paint, or other materials to create the design. If you are using paint, make sure to use a paint specifically designed for plastic surfaces. Once you have chosen the design, you can begin to apply it to the chair.
If you are using stencils, place the stencil on the chair and use a pencil to trace the design. Once you have traced the design, you can use a brush or sponge to apply the paint. If you are using other materials, such as fabric or ribbon, you can use a hot glue gun to attach them to the chair.
Once the design is complete, you can seal it with a clear coat of sealant. This will help protect the design and ensure it lasts for years to come.
Creating a custom design on plastic chairs is a great way to add a unique touch to any room. With a few simple steps, you can transform a plain plastic chair into a one-of-a-kind piece of furniture.
Troubleshooting Common Painting Problems on Plastic Chairs
Painting plastic chairs can be a great way to give them a new look and add a personal touch to your home. However, it is important to be aware of some common painting problems that can occur when painting plastic chairs. This article will provide some tips on how to troubleshoot these common painting problems.
1. Paint Not Adhering: One of the most common problems when painting plastic chairs is that the paint does not adhere properly. This can be caused by a number of factors, including the type of plastic used, the type of paint used, and the surface preparation. To ensure that the paint adheres properly, it is important to use a primer specifically designed for plastic surfaces. Additionally, it is important to make sure that the surface is clean and free of any dirt or debris before painting.
2. Paint Peeling: Another common problem when painting plastic chairs is that the paint can start to peel off after a few weeks or months. This can be caused by a number of factors, including the type of paint used, the type of plastic used, and the surface preparation. To prevent this from happening, it is important to use a paint specifically designed for plastic surfaces and to make sure that the surface is clean and free of any dirt or debris before painting.
3. Paint Cracking: Paint can also start to crack after a few weeks or months. This can be caused by a number of factors, including the type of paint used, the type of plastic used, and the surface preparation. To prevent this from happening, it is important to use a paint specifically designed for plastic surfaces and to make sure that the surface is clean and free of any dirt or debris before painting. Additionally, it is important to use a topcoat to protect the paint from cracking.
By following these tips, you can help ensure that your plastic chairs look great and last for years to come.
Protecting Your Plastic Chairs After Painting: What You Need to Know
Painting plastic chairs can be a great way to give them a new look and add a personal touch to your home. However, if you don’t take the proper steps to protect your chairs after painting, you could end up with a mess. To ensure that your chairs look great for years to come, here’s what you need to know about protecting them after painting.
First, you should always use a primer before painting your plastic chairs. Primer helps the paint adhere to the plastic and prevents it from chipping or peeling off. Make sure to use a primer specifically designed for plastic surfaces, as other types of primer may not be as effective.
Once you’ve applied the primer and let it dry, you can begin painting your chairs. Use a paint specifically designed for plastic surfaces, as this will help ensure that the paint adheres properly and won’t chip or peel off.
Once you’ve finished painting your chairs, you’ll need to protect them from the elements. To do this, you should apply a clear coat of sealant or varnish. This will help protect the paint from fading or chipping due to exposure to the sun or rain.
Finally, you should also consider adding a layer of wax to your chairs. This will help protect the paint from scratches and other damage. Make sure to use a wax specifically designed for plastic surfaces, as other types of wax may not be as effective.
By following these steps, you can ensure that your plastic chairs look great for years to come. With the right primer, paint, sealant, and wax, you can protect your chairs and keep them looking their best.
Q&A
1. What type of paint should I use to paint plastic chairs?
A: You should use a paint specifically designed for plastic surfaces, such as a spray paint or a brush-on acrylic paint.
2. How should I prepare the chairs before painting?
A: Before painting, you should clean the chairs with a mild detergent and water, then sand them lightly with fine-grit sandpaper.
3. Do I need to use a primer before painting?
A: Yes, it is recommended to use a primer before painting plastic chairs. This will help the paint adhere better and last longer.
4. How many coats of paint should I apply?
A: It is recommended to apply two coats of paint for best results.
5. How long should I wait between coats?
A: You should wait at least 24 hours between coats of paint.
6. How should I clean the brushes after painting?
A: After painting, you should clean the brushes with warm soapy water and allow them to dry completely before storing.
7. How long should I wait before using the chairs after painting?
A: You should wait at least 48 hours before using the chairs after painting.
8. Can I paint the chairs outdoors?
A: Yes, you can paint the chairs outdoors as long as the temperature is above 50 degrees Fahrenheit and there is no rain in the forecast.
9. What type of finish should I use?
A: You should use a clear sealer or varnish to protect the paint and give it a glossy finish.
10. How should I store the chairs after painting?
A: After painting, you should store the chairs in a cool, dry place away from direct sunlight.
Conclusion
Painting plastic chairs is a great way to give them a new look and add a personal touch to your home. It is important to use the right type of paint and primer for the job, as well as to properly prepare the surface of the chair before painting. With the right tools and techniques, you can easily give your plastic chairs a fresh, new look.
- how plastic chairs - April 24, 2024
- where to clean plastic chairs - April 24, 2024
- where to hire plastic chairs - April 24, 2024