Introduction
Restoring plastic chairs can be a great way to give them a new lease of life. Whether you have a set of plastic chairs that have seen better days, or you’ve just picked up a second-hand set, restoring them can be a fun and rewarding project. In this guide, we’ll show you how to restore plastic chairs, from cleaning and repairing them to giving them a new coat of paint. With the right tools and materials, you can have your plastic chairs looking like new in no time.
How to Clean and Restore Plastic Chairs
Plastic chairs are a popular choice for outdoor furniture due to their durability and affordability. However, over time, plastic chairs can become dirty and faded from exposure to the elements. Fortunately, with a few simple steps, you can restore your plastic chairs to their original condition.
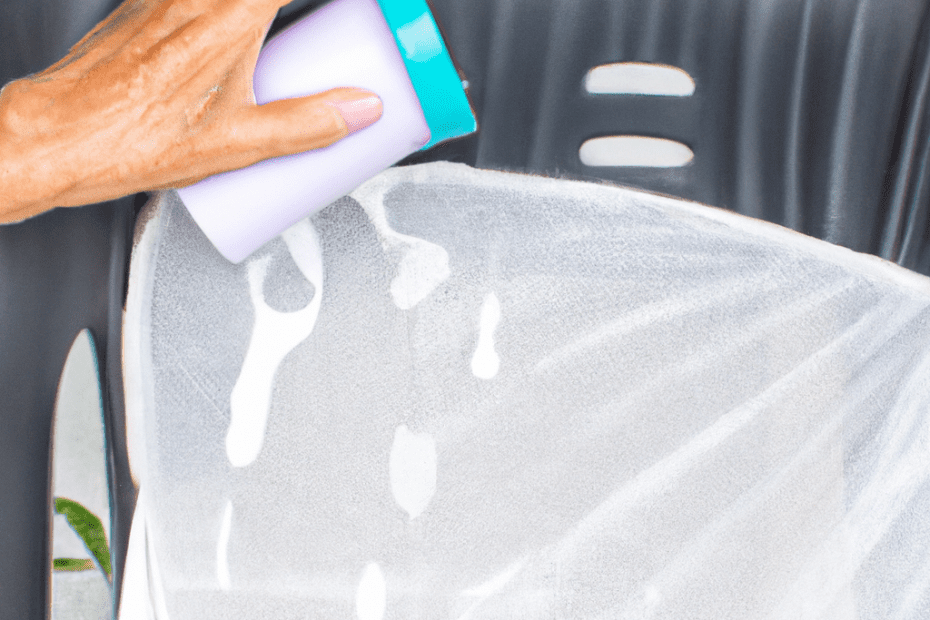
First, you will need to clean the chairs. Begin by wiping down the chairs with a damp cloth to remove any dirt or debris. If the chairs are particularly dirty, you may need to use a mild detergent and a soft brush to scrub away any stubborn dirt. Once the chairs are clean, rinse them off with a hose or a bucket of water.
Next, you will need to restore the color of the chairs. To do this, you will need to purchase a plastic chair restorer from your local hardware store. Follow the instructions on the package to apply the restorer to the chairs. This will help to restore the original color of the chairs and protect them from further fading.
Finally, you will need to protect the chairs from the elements. To do this, you can apply a coat of outdoor furniture wax to the chairs. This will help to protect the chairs from UV rays and moisture.
By following these steps, you can easily clean and restore your plastic chairs. With a little bit of effort, you can make your outdoor furniture look like new again.
How to Repair Cracks and Chips in Plastic Chairs
Plastic chairs are a popular choice for outdoor furniture due to their durability and affordability. However, over time, these chairs can become cracked or chipped due to exposure to the elements or general wear and tear. Fortunately, repairing cracks and chips in plastic chairs is a relatively simple process.
To begin, you will need to gather the necessary supplies. These include a plastic adhesive, a putty knife, sandpaper, and a cloth. Once you have all of the supplies, you can begin the repair process.

Start by cleaning the area around the crack or chip with a cloth. This will help to remove any dirt or debris that may be present. Next, use the putty knife to scrape away any loose pieces of plastic. This will help to ensure that the adhesive will adhere properly.
Once the area is clean and free of debris, you can apply the plastic adhesive. Use the putty knife to spread the adhesive evenly over the crack or chip. Allow the adhesive to dry completely before proceeding.
Once the adhesive is dry, use the sandpaper to smooth out the area. This will help to ensure that the repair is even and seamless. Finally, use a cloth to wipe away any excess dust or debris.
Your plastic chair should now be repaired and ready for use. With proper care and maintenance, your chair should last for many years to come.
How to Remove Stains from Plastic Chairs
Removing stains from plastic chairs can be a tricky task, but with the right approach, it can be done. Here are some tips to help you get rid of those pesky stains:
1. Start by wiping the chair with a damp cloth to remove any loose dirt or debris.
2. If the stain is still visible, mix a solution of warm water and mild dish soap. Dip a soft cloth into the solution and gently scrub the stained area.
3. If the stain is still present, try using a mild abrasive cleaner such as baking soda or a commercial cleaner designed for plastic. Apply the cleaner to the stained area and scrub gently with a soft cloth.

4. If the stain is still visible, try using a commercial stain remover designed for plastic. Follow the instructions on the package and apply the product to the stained area.
5. Once the stain is removed, rinse the area with clean water and dry with a soft cloth.
By following these steps, you should be able to remove most stains from plastic chairs. If the stain is particularly stubborn, you may need to repeat the process several times.
How to Paint Plastic Chairs

Painting plastic chairs is a great way to give them a new look and extend their life. With the right preparation and materials, you can easily paint plastic chairs to match your home décor.
Before you begin, make sure the chairs are clean and free of dirt and debris. Use a mild detergent and warm water to scrub the chairs, then rinse them off with a hose or a bucket of clean water. Allow the chairs to dry completely before you start painting.
Next, use a fine-grit sandpaper to lightly sand the chairs. This will help the paint adhere better and create a smoother finish. Once you’ve finished sanding, wipe the chairs down with a damp cloth to remove any dust or debris.
Now you’re ready to start painting. Use a paintbrush or a roller to apply a coat of primer to the chairs. Allow the primer to dry completely before you move on to the next step.
Once the primer is dry, you can start painting the chairs. Use a paintbrush or a roller to apply a coat of acrylic paint. Make sure to use even strokes and cover the entire surface of the chairs. Allow the paint to dry completely before applying a second coat.
Once the paint is dry, you can apply a coat of clear sealer to protect the paint and give it a glossy finish. Allow the sealer to dry completely before using the chairs.
With the right preparation and materials, you can easily paint plastic chairs to give them a new look. Follow these steps and you’ll have beautiful, freshly painted chairs in no time.
How to Refinish Plastic Chairs
Refinishing plastic chairs can be a great way to give them a new look and extend their life. With the right supplies and a bit of patience, you can make your plastic chairs look like new. Here is a step-by-step guide to help you get started.
Step 1: Gather Supplies
Before you begin, make sure you have all the supplies you need. You will need a plastic cleaner, a plastic primer, a plastic paint, a paintbrush, and a sandpaper.
Step 2: Clean the Chairs
Using the plastic cleaner, thoroughly clean the chairs to remove any dirt or debris. Make sure to get into all the nooks and crannies.
Step 3: Sand the Chairs
Using the sandpaper, lightly sand the chairs to create a rough surface for the primer and paint to adhere to.
Step 4: Apply Primer
Using the paintbrush, apply a thin layer of primer to the chairs. Allow the primer to dry completely before moving on to the next step.
Step 5: Paint the Chairs
Using the paintbrush, apply a thin layer of paint to the chairs. Allow the paint to dry completely before applying a second coat.
Step 6: Allow to Dry
Allow the chairs to dry completely before using them.
Refinishing plastic chairs is a great way to give them a new look and extend their life. With the right supplies and a bit of patience, you can make your plastic chairs look like new. Follow these steps and you will be well on your way to having beautiful, newly refinished plastic chairs.
How to Replace Parts on Plastic Chairs
Replacing parts on plastic chairs is a relatively simple process that can be completed with a few basic tools. Before beginning, it is important to ensure that the correct replacement parts are purchased.
To begin, the chair should be placed on a flat surface and the screws should be removed from the chair. Depending on the type of chair, the screws may be located on the underside of the seat or on the legs of the chair. Once the screws have been removed, the seat or leg can be taken off.
Next, the old part should be removed from the chair. This can be done by unscrewing any screws that are holding the part in place. Once the part has been removed, the new part can be installed. The new part should be placed in the same position as the old part and secured with screws.
Finally, the screws should be tightened to ensure that the part is securely in place. Once the screws have been tightened, the chair can be reassembled and tested to ensure that it is functioning properly.
Replacing parts on plastic chairs is a relatively simple process that can be completed with a few basic tools. With the correct replacement parts and a few simple steps, the process can be completed quickly and easily.
How to Strengthen and Reinforce Plastic Chairs
Plastic chairs are a popular choice for outdoor furniture due to their affordability and durability. However, over time, plastic chairs can become weakened and need to be reinforced. Fortunately, there are several steps you can take to strengthen and reinforce your plastic chairs.
First, inspect the chairs for any cracks or breaks. If you find any, use a plastic welding kit to repair them. This will help to prevent further damage and ensure the chairs are structurally sound.
Next, use a drill to add screws to the joints of the chairs. This will help to reinforce the joints and make them more secure. Make sure to use screws that are the same size as the holes in the plastic.
Finally, use a strong adhesive to attach metal plates to the chairs. This will help to reinforce the chairs and make them more durable. Make sure to use an adhesive that is designed for plastic and metal.
By following these steps, you can easily strengthen and reinforce your plastic chairs. Doing so will help to ensure they last for many years to come.
How to Restore Faded Plastic Chairs
Restoring faded plastic chairs can be a simple and cost-effective way to bring new life to an old piece of furniture. With a few simple steps, you can restore your plastic chairs to their original condition.
First, you will need to clean the chairs. Use a mild detergent and warm water to remove any dirt or debris. Rinse the chairs thoroughly and allow them to dry completely.
Next, you will need to sand the chairs. Use a medium-grit sandpaper to lightly sand the chairs. This will help to remove any scratches or discoloration. Be sure to sand in the same direction as the grain of the plastic.
Once the chairs have been sanded, you will need to apply a plastic restorer. This product is designed to restore the original color and shine of the plastic. Apply the restorer according to the manufacturer’s instructions.
Finally, you will need to apply a protective coating. This will help to protect the chairs from future fading and discoloration. Apply a clear coat of polyurethane or a UV-resistant sealant.
By following these steps, you can easily restore faded plastic chairs. With a little bit of effort, you can bring new life to an old piece of furniture.
How to Remove Rust from Plastic Chairs
Removing rust from plastic chairs can be a tricky task, but it is possible with the right tools and techniques. Rust can cause permanent damage to plastic chairs, so it is important to take the necessary steps to remove it as soon as possible.
The first step is to gather the necessary materials. You will need a soft cloth, a plastic scrubbing pad, a mild detergent, and a rust remover. If the rust is particularly stubborn, you may need to use a stronger rust remover.
Once you have the materials, begin by wiping down the chair with a soft cloth and mild detergent. This will help to remove any dirt or debris that may be stuck to the chair.
Next, use the plastic scrubbing pad to gently scrub away the rust. Be sure to use light pressure and move in a circular motion. If the rust is particularly stubborn, you may need to use a stronger rust remover.
Once the rust has been removed, rinse the chair with clean water and dry it with a soft cloth. If there are any remaining rust stains, you can use a rust remover to remove them.
Finally, apply a coat of wax or polish to the chair to help protect it from future rust.
By following these steps, you can easily remove rust from plastic chairs and keep them looking like new.
How to Restore Discolored Plastic Chairs
Restoring discolored plastic chairs can be a simple and cost-effective way to bring new life to an old piece of furniture. With a few simple steps, you can restore the original color of your plastic chairs and make them look like new.
First, you will need to clean the chairs. Use a mild detergent and warm water to remove any dirt or debris from the surface of the chairs. Once the chairs are clean, you can begin the restoration process.
Next, you will need to sand the chairs. Use a medium-grit sandpaper to lightly sand the surface of the chairs. This will help to remove any discoloration and prepare the surface for the next step.
Once the chairs are sanded, you will need to apply a plastic restorer. This product is designed to restore the original color of the plastic. Apply the restorer to the chairs using a soft cloth and allow it to dry completely.
Finally, you will need to apply a protective coating to the chairs. This will help to protect the chairs from future discoloration and wear. Use a clear sealant or a UV-resistant coating to protect the chairs.
By following these steps, you can easily restore the original color of your plastic chairs. With a little bit of effort, you can make your chairs look like new again.
Q&A
1. What is the best way to clean plastic chairs?
Answer: The best way to clean plastic chairs is to use a mild detergent and warm water. Use a soft cloth or sponge to gently scrub the surface of the chair. Rinse the chair with clean water and dry it with a soft cloth.
2. How do I remove scratches from plastic chairs?
Answer: To remove scratches from plastic chairs, use a mild abrasive cleaner such as baking soda or toothpaste. Apply the cleaner to the scratched area and gently rub it in with a soft cloth. Rinse the chair with clean water and dry it with a soft cloth.
3. How do I remove stains from plastic chairs?
Answer: To remove stains from plastic chairs, use a mild detergent and warm water. Use a soft cloth or sponge to gently scrub the stained area. Rinse the chair with clean water and dry it with a soft cloth.
4. How do I restore faded plastic chairs?
Answer: To restore faded plastic chairs, use a mild detergent and warm water. Use a soft cloth or sponge to gently scrub the faded area. Rinse the chair with clean water and dry it with a soft cloth.
5. How do I remove mold from plastic chairs?
Answer: To remove mold from plastic chairs, use a mild detergent and warm water. Use a soft cloth or sponge to gently scrub the moldy area. Rinse the chair with clean water and dry it with a soft cloth.
6. How do I remove rust from plastic chairs?
Answer: To remove rust from plastic chairs, use a mild detergent and warm water. Use a soft cloth or sponge to gently scrub the rusty area. Rinse the chair with clean water and dry it with a soft cloth.
7. How do I remove paint from plastic chairs?
Answer: To remove paint from plastic chairs, use a mild detergent and warm water. Use a soft cloth or sponge to gently scrub the painted area. Rinse the chair with clean water and dry it with a soft cloth.
8. How do I restore discolored plastic chairs?
Answer: To restore discolored plastic chairs, use a mild detergent and warm water. Use a soft cloth or sponge to gently scrub the discolored area. Rinse the chair with clean water and dry it with a soft cloth.
9. How do I remove grease from plastic chairs?
Answer: To remove grease from plastic chairs, use a mild detergent and warm water. Use a soft cloth or sponge to gently scrub the greasy area. Rinse the chair with clean water and dry it with a soft cloth.
10. How do I restore faded colors on plastic chairs?
Answer: To restore faded colors on plastic chairs, use a mild detergent and warm water. Use a soft cloth or sponge to gently scrub the faded area. Rinse the chair with clean water and dry it with a soft cloth. You can also use a color-safe bleach to restore the original color of the chair.
Conclusion
Restoring plastic chairs is a relatively simple process that can be done with a few basic tools and supplies. Start by cleaning the chairs with a mild detergent and warm water. Then, use a plastic filler to fill in any cracks or chips. Once the filler has dried, sand the chairs down to create a smooth surface. Finally, apply a coat of paint or primer to the chairs to give them a fresh, new look. With a little bit of effort, you can easily restore your plastic chairs and make them look like new again.
- how plastic chairs - April 24, 2024
- where to clean plastic chairs - April 24, 2024
- where to hire plastic chairs - April 24, 2024